Creative Computing Hub Oslo (C2HO) presents a series of workshops focused on getting started with creative computing in p5.js, a beginner-friendly JavaScript library with a full set of drawing and sound-making functionalities. In the first workshop we will be focusing on teaching the basics of using p5.js, focusing on drawing and animation.
Part 1: Introduction and Shapes
To begin with p5.js, you must understand the structure of the development environment. When a new file is created, two functions are always defined: setup and draw.
The setup function is the first function that runs when the code is run. Here you can define any variables that do not need to be dynamically altered during the execution of the code. The setup function automatically includes the createCanvas, which is used to specify the width and height of the canvas you will draw on.
The draw function runs continuously in a loop until the program is terminated. It is also possible for the draw function to only run once using the noLoop function. On default, the draw function is called 60 times per second. This can change by calling the frameRate function.
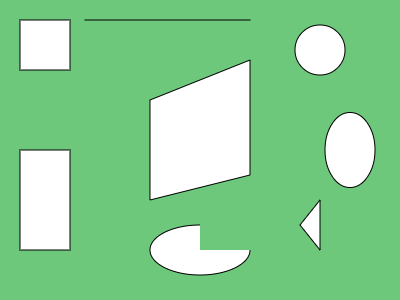
Now, we'll learn to draw basic shapes. Below you can see a selection of different shapes p5.js allows you to draw with functions, including rectangles, ellipses, and arcs.
Part 2: Draw a Smiley
Now that we know how to draw shapes, we can now create a more aesthetically pleasing drawing. For this workshop, we'll be using a smiley face as an example. To begin, we want to make sure the smiley will be in the same relative position on the canvas no matter what width and height we set for the canvas. To do this, we use the width and height variables that are defined by p5.js by the parameters in the createCanvas function.
The translate function can now be used in conjunction with the width and height variables to displace the shapes we are going to draw so they are drawn in the center of the canvas. This is accomplished by writing "translate(width/2, height/2)" before drawing the shapes.
After translating to the center, we can begin drawing our smiley by first starting with the circle for its face. To change the color of any shape, use the fill function. In order to make sure the formatting for all shapes are different (including shape fill and border settings), the push and pop functions should be used before and after drawing each shape, respectively.
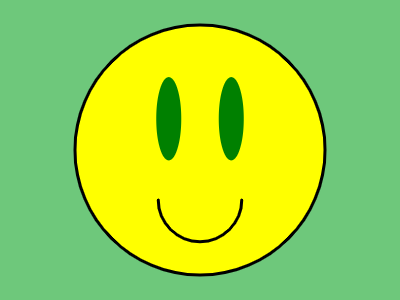
Next, the eyes are drawn with 2 ellipses. It's worth noting that the width and height of all shapes inside the smiley are set in relation to the diameter of the outer circle, to allow for a dynamically sized shape. To remove the black border around the ellipses, the noStroke function can be used.
Finally, an arc is drawn for the smile. To remove the the fill color, you can use the noFill function. To adjust the thickness of the smile, you can use the strokeWeight function.
Once these shapes are drawn, a finished smiley is drawn, which you can see an example of below.
Part 3: Randomization
Now that we've drawn our smiley, we can begin editing its features. For the sake of code cleanliness, we will begin by moving all code used to draw the smiley to a function outside of the draw function. We can then pass different parameters to this function to create different smilies. The random function allows us to generate random values for these parameters to create interesting and unpredictable drawings. For every pass through the draw loop, we will generate a new smiley with a random x coordinate, y coordinate, and diameter, which you can view below.
Part 4: Arranging a Grid of Smilies
To contrast with the randomly sized smilies, we will now draw something a little more structured with other random elements. Below, you can view the code to create a grid of smiley faces, all with their own randomly generated face and eye colors.
Part 5: Introduction to Animation, Part 1
We can now begin to bring our smiley to life through animation. As mentioned above, the draw function run continuously in a loop, allowing us to make seamless animations by changing variables by small increments. In the code below, you can view how to reset a smiley before it goes off the edge of the screen.
Part 6: Introduction to Animation, Part 2
To further explore animation, we can also change the reset functionality above to a "bounce functionality" to send our smiley in the other direction following contact with an edge of the canvas. We also randomized the x and y speed, smiley face color, and smiley eye color, and also moved the background function from the draw function to the setup function to save all the smiles on the screen. You can view the results below.
Part 7: Mouse Interaction
p5.js also allows users to interact with the canvas as well. For this section, we will explore the different ways we can use our mouse to interact with p5.js sketches.
The boolean mouseIsPressed is used in the example below to only draw a smiley if the mouse is pressed down. Using the mouseX and mouseY system variables, we can find exactly where our mouse is on the canvas. In the sketch below, we use these variables to draw the smiley's centroid where our mouse lies on the canvas. Using the mousePressed, mouseReleased, and mouseDragged functions, we can initiate different behaviors for each of those actions. In the example below, the background will turn red if the mouse is pressed, blue if the mouse is dragged, and green if the mouse is released.
Part 8: Keyboard Interaction
p5.js allows allows canvas interaction with your keyboard. The keyIsPressed boolean can detect if any key is pressed. In the sketch below, the arrow keys detect if an arrow key is pressed and moves the smiley in that direction. The system variable key contains the most recent key that was typed, while the system variable keyCode detects special characters like spaces and arrow keys. Likewise, the keyTyped function activates when all keys are pressed except for special action keys, and while keyPressed activates every time any key is pressed. In the below sketch, the keyTyped function and key variable are used when non-special characters are typed to display the typed message on the screen, while the keyPressed function and keyCode variable are used when a backspace is typed to delete the previous character in the message.